Showing posts with label Revamps. Show all posts

Thursday, March 19, 2020

Covid Lockdown = TIDY UP !!


Here I am at the start of 2020 getting slowly organised ... Cover lockdown has given me an excuse to do this!! Above image (from one end of the studio) doesn't look very roomy .. but once things are fully away in cupboards & on shelves, I hope it will be!! Some curtains are ready for stitching on the island unit - it's an excellent height for doing this & with its stainless steel top, means it will be perfect for any paints or similar.

However, I doubt if I will be using this as a main studio blog anymore ... unless I have something related to its use as a 'working studio' (i.e. for use & equipment only). The reason is I'm trying to co-ordinate things better so that certain blogs become "more specific & dedicated" ... so if you want to read more of what I'm actually doing, please click here so that you can "follow my journey".

Saturday, April 26, 2014

Recycled black necklace ...

Taking around half an hour to make, this recycled necklace wears well!!


Several weeks ago I was to wear a black outfit (slightly Edwardian styling) & was unable to find exactly the jewellery suitable to match it.

However I found a 'base necklace' in Sainsbury's (a heart on a rope) & added to it by raiding my 'odds & ends' boxes.

Left is the completed result!


A length of narrow ribbon was knotted into the heart 'link' & individual beads, links & small hearts (from a broken bracelet) were knotted along each half section.

Monday, March 31, 2014

Renovate a blind & track ...

Inheriting a 'Next' black folding faux suade window blind (lined), I decided I would renovate it as I haven't done one before & thought it a good experimental exercise! The track cords were in a bad state of repair (ie. the blind didn't go up & down) & the blind itself, was quite dusty with a slightly cigarette/smoky smell.

Recommended for dry cleaning, I decided to have a go & 'wash' it - after all what was to be lost?

Not to actually soak it, I used 'Ecover' washing liquid making a mild solution in warm water along with an old tea towel (soft yet not fluffy).

The track & blind were taken down & lightly brushed. Next, the blind was vacuumed with a soft vacuum upholstery brush, then shaken vigorously outside.

The track pieces were then wiped clean BUT leaving all cords in place as a guide.


Left: The track & blind metal & plastic pieces.
Right: Cords at upper locking rollers had almost disintegrated & had become "shredded" & somewhat knotted in places.


The blind was measured for cord lengths: the blind's drop + upper width of track +side length for cord 'pull'. Cords were cut & following the 'guides' of the old track, each cord (there were only 2) was replaced.


End caps were attached at each pull end & then the cords free-hanging lengths loosely knotted in place.


 The blind was layed over a soft towel & with the damp cloth & the Ecover solution, carefully wiped. The lining side was completed first. Turning over, the faux suade side was then done - finishing with a wipe in the direction of the suade. (Image right shows dirt removed in first wipe!)


When completed, each side was gently sprayed with 'Febreze' fabric spray & again lightly wiped with the damp cloth. AT NO TIME was the blind saturated & left to remain wet. Before leaving to totally dry, the blind was given a slight "widthways pull" to straighten & shape up.

It was then left to dry for 2 days in a warm room ...  further news when dry!

NOTE: If you want to try this, test a small fabric area for colourfastness - I didn't as I had nothing to lose!!

Monday, February 24, 2014

Coppered bedhead finished !


The bedhead is finished & this is the main gold edge repainted - the rust spots have covered well. If you want to see it complete, click ' Hammerited'.

Saturday, February 22, 2014

Renovating a Bed frame ...


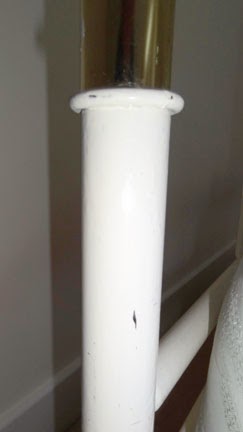
The bedhead (frame) mentioned in Stitcherydoodaa Make-overs is underway. Cleaned last week with sugar soap, I'm using Hammerite paint in white & copper. I like the hammered finish PLUS it covers metal well - I've used it many times in the past with good effect. As you can see from the images above, there is some pitting & paint chips (where it had been previously painted) in a variety of places.

Thursday, December 5, 2013

Making WAVE curtains adapting pleated headed tape ...


I've recently been adapting woven pocket-pleat heading tape for making a pair of 'wave curtains' (see my Stitcherydoodaa blog for details). Conventionally, this is the sort of tape you find on a pair of readymade curtains (image at left) where you pull the heading cords up & immediately a row of 'pencil' pleats' appears across the top of the curtain. Hooks are then placed in any of the pockets to hang the curtains - minor adjustments made to curtain length by varying the position of the hooks in either the upper, middle or lower hook-pocket rows.

Here's my results:


Prepare the curtains as per normal or buy ready-mades - total width of curtains a matter of personal choice but at least a minimum of the pole. If using pencil-pleated tape, ensure the tape's edge is stitched as close as possible to the top of the curtain & just fold under the ends of the tape at either edge as the cords will not be pulled up. The lower edge of the tape should also be stitched down so that the heading tape will now only be a stiffening/support.


Using a total even number of hooks (basic metal ones) per curtain, equally space them across the upper edge pockets of the heading - this will ultimately produce the 'wave' fold when the hooks are in the rings (see image right).


To complete the 'wave' effect, please refer to the instructions detailed in 'Dressing a Window' (click to read it).

Tuesday, November 19, 2013

Decorating = Finishing outstanding jobs !! ...


For the past week or so I've been involved preparing for the decorator (buying etc etc) which has led into finishing a few outstanding sewing jobs. They are all being updated on the Stitcherydoodaa Blog ... above shows a cuff-link style button made for the patchwork waistcoat.

As decorating is underway for several rooms, I'm now spending some time making a variety of window coverings & curtains - these will also be on view in a few weeks time when completed.

Tuesday, September 10, 2013

40s Humpty (Pouffe) : Renovation update 3 ...

The 'Humpty' has now been laced with its outers:

First the lower panel was laced with a black Russia braid through the eyelets. Each side panel was then laced through its lower edge with an off-white cord (one for each edge & through further Russia braid), returning through the seams on the side's upright edges. These were left (to appear near the Humpty's upper corners) until the upper lacing was complete.


Another off-white cord was then laced through the upper rings & through the upper edge of the side panels (also through Russia braid) - each edge of the Humpty having a separate cord.

A central cord was tied around the Humpty's middle.


Ends & lacings were then adjusted to centralise all panels.

The loose ends were knotted on the upper corners, cords cut & ends frayed.

Wednesday, August 21, 2013

40s Humpty (Pouffe) : Renovation update 2 ...

Here's the outer 'bag' (left) now clean & with rings repaired - image left shows detail (if you want to read more about the making of this item, please click here @ Stitcherydoodaa.


Saturday, August 10, 2013

40s Humpty (Pouffe) : Renovation update 1 ...

The inside 'seat' has been brushed, cleaned & "freshened" using Fabreze spray. The outer panels have all been washed & although they all shrank (I'm hoping won't make too much of a difference in its renewal as when originally made, shrinkage was allowed for).


By the way, the inner 'seat' (above) was made using an authentic 'Humpty' pattern & was filled with an extensive range of cut-up odd fabric scraps, tights, pop socks and anything else I came across to use. Cut into very small 'packing' pieces, the "innerds" resulted in a very heavy seating and perfect for its use - a highly recommended way of using old textiles & better than just throwing them away!

Here's the outer 'bag', washed & ready for repair of the brass rings (hopefully I'll be able to find the spares!)

(Pattern & instructions for making the original 'Humpty' are here: originals)


Saturday, July 20, 2013

How I'm Restoring my '40s Pouffe ...

Today I've started to clean my '40s pouffe - it has to be unassembled first to get to the individual sections. I made this over 10 years ago & overall surprised generally how clean it has kept. I intend to restore it to its original condition - providing fffurther instructions here should you also like to make one of these 'seats'. (By the way, it is influenced by 1940's Make-Do-&-Mend' & so is its inside!)

The outer covering (below left) is laced by 4 central tucked bands (below right) which is held in place with a centrally tied 'rope'.


The cords were cut away/unlaced around the upper section & the underneath panel (below) then the outer 'corset' was removed.


The individual pieces can now be cleaned & repaired as the entire outer 'bag' (below) has a zip to insert the inner seat (as per Pouffe here). 


Monday, July 8, 2013

40s Pouffe repair ...

This is the 1940s-style pouffe made a few years ago & mentioned earlier in my blog. The outer 'skirt' is detachable both for cleaning (more pix if you click here) & this is what will be happening soon.


Monday, March 25, 2013

Old cottons & laces ...


I'm in the middle of some more cotton 'samples cleaning & restoration' - using my tried & tested old-fashioned recipe. If you want to find out how to do it, click this link: OLD-TIME RECIPE - it's also good for stubborn stains on 100% cotton fabrics (eg. curry on a man's shirt!).

PLEASE NOTE: As with all washing, test a sample first!

Wednesday, March 20, 2013

Chair seats revamped


The seating for the above dining chair was originally off-white - suitable for the previous house lived in but not now. The room is basically black & these chairs are perfect so solution was to enhance them with fabric leftover from the footstool project (click to link). Finished (with a spare for emergency food spills!) they are waiting for some back cushions as the metal can sometimes be a little 'hard'. To see 'drapes' in the same room under construction, click here.

Thursday, March 14, 2013

Stapling a foot ...


Last year I quickly recovered a footstool before moving - a really quick job if you use staples (above stool foot). If you click Stitcherydoodaa's Projects  you'll be able to see the result.

Thursday, March 7, 2013

1930s Carver revamped ...

At left is a chair I renovated a few years ago. Originally a 1930s 'carver' it was the only one of the set suitable ie. it hand arms ! It was sanded down to bare wood (oak) then hand painted in a variety of different neutral colours before finally being "sponge" finished. Once completed it was varnished for durability.

The seat was also 're-vamped' using some dressmaking fabric - the only one I could find that blended in the hall where it was to be used. 

However, now after moving, its likely the seating will be renovated again to better suit the room its to be put in - more news on this over the forthcoming year.
Sponged arm

Sponged ladder-back

Sponged ladder-back


Tuesday, March 5, 2013

Make Do & Mend ...


This is the 1940s-style pouffe/footstool made a few years ago as a textile experiment of patchwork-smocking-quilting combined. It was made as a result of some research re: WWII 'Make-do-&-Mend' & has been worked using period techniques from the time. It utilises a variety of authentic textiles & haberdashery as well as 'left-overs' in my own 'stashes' - it also was filled entirely in old stockings & pop-socks collected together & then cut into small pieces. For this reason, it is very heavy & ideal as a seat! The outer 'skirt' is detachable both for cleaning & decoration to change its appearance (more pix if you click here).

NOTE: Currently I'm on an artistic journey which involves recording all my works - past, present & into the future! Because of my background, I also like to revamp & renovate items (very Make-do-&-Mend and Recycle !) & often find it extremely challenging. If you click on this link, you'll find some of my recent works gradually appearing. Ultimately it will include a wide range of things from small decorative items to home interior decoration.

Tuesday, December 4, 2012

December 2012 - One year on

This is my actual working studio where I can now physically 'get hands on' to create various textile items or work digitally on other creative projects and in doing this blog, I've just noticed it's almost a year on since I moved all my craft & textile things here - now it looks more studio-like! (view towards the window below).


Most of what you can see in the studio (in this & previous picture) was somewhere or another around the house I was living in ... it's just great now having most of it under one roof (even though it needs tidying up!) However, the downside is that if you need something at home you haven't got it 'on hand' - although just a small price really that's off-set by having a dedicated work space.

It's also nice to have everything somewhat 'mobile' & that is working itself around how you work. It's also great to have several different things on the go - all within view ... you can do bits just as you want! - or leave them if there's no time to finish!


Monday, December 3, 2012

A commercial unit is transformed into a studio ...


This story began briefly on one of my other blogs but exists here as the first part part of my 'new creative journey' at this later stage of my life!

Back in 2011, myself & partner decided to re-locate our businesses from Hertfordshire to the Avon/Somerset area - this is the 'saga' of how a business unit was transformed (in under a year) into a working studio. To read the full story & see how this ... 

 became this ...