Showing posts with label Experimental artwork. Show all posts

Thursday, March 19, 2020

Covid Lockdown = TIDY UP !!


Here I am at the start of 2020 getting slowly organised ... Cover lockdown has given me an excuse to do this!! Above image (from one end of the studio) doesn't look very roomy .. but once things are fully away in cupboards & on shelves, I hope it will be!! Some curtains are ready for stitching on the island unit - it's an excellent height for doing this & with its stainless steel top, means it will be perfect for any paints or similar.

However, I doubt if I will be using this as a main studio blog anymore ... unless I have something related to its use as a 'working studio' (i.e. for use & equipment only). The reason is I'm trying to co-ordinate things better so that certain blogs become "more specific & dedicated" ... so if you want to read more of what I'm actually doing, please click here so that you can "follow my journey".

Friday, October 25, 2013

Honesty image comes alive! ...


This morning I'm looking through some previously 'unused experiments' & found these at left - so saves me having to repeat the processes!


They capture exactly what I'm trying to acheive & by using along with yesterday's sample, have created the one below:


Immediately I finished it, it seemed perfect as a solution for the starting point for an image/design (Honesty) begun a few years ago:

Thursday, October 24, 2013

2 experiments that went well! ...

I've been experimenting with a heat gun as well as using unconventional "fabric" - here are the results of 2 exciting experiments.

The orange one (result of heat) will possibly be added to an earlier 'cell' (see "Project:Cell" when you've clicked here) & the blue one (painted) will be continued with further enhancement(s). In both samples, it's the textures I primarily like as they are achieving the result I'm after.


Friday, October 18, 2013

X-ray cells !! ...

I've begun my first experiments & sample techniques using 'transparency, illusion & movement (implied or otherwise)' as an initial 'topical' starting point. They were several areas I was interested in a few years ago but unfortunately got 'side-tracked' & was unable to continue with this line of thoughts. Now resurrecting it (especially as it's a suitable topic for my 'cells' project - click if you want to see more), I intend to continue from where I left off. I've quite a few new ideas to play with as well as some from those I left 'mid-stream'. Here's a few experimental 'quick' designs I'm playing with:


This one relates to 'illusion' & is the result of working on a 'plastic carrier bag'. I like the crazing & central imagery & is a very similar effect to the one titled 'An Alien? I made.


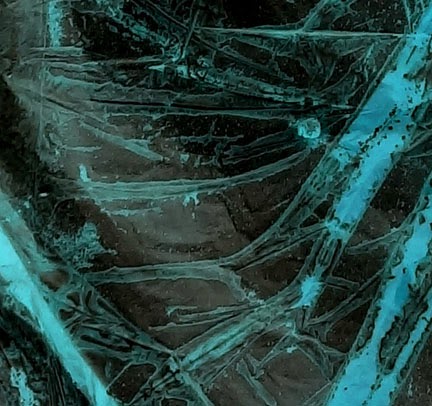
An initial section of the above has been 'computer enhanced' (right) & now appears to resemble an X-ray. I shall be working on this more at the weekend (hopefully if time permits) & possibly taking it further to another stage.

Although only an experiment, I am going to call it 'Fossil X-Ray' as that's exactly what it reminds me of ... but more on this later !!


The next series of 'experiments' will involve 'transparency & movement'. Here a fabric swatch from 'yesterday practical work' (an off-cut coloured with water colour pencils) have been revolved through 360 degrees showing the effect of sunlight & shade on the colours & fabrics involved. Again, over the weekend, I'm hoping to work on this some more with other finishings.

Wednesday, October 9, 2013

Cells: Structure experiments ...


One of my initial designs last week used coloured tissue paper glued onto black paper. After drying, it was enhanced with waxed crayons & ink.


Apart from 'transparency', I'm also experimenting with 'light & movement'.

With this in mind, I confirmed particular lighting conditions enhanced 'hidden' colours & movement displayed them (ie. appearing & disappearing).


I then wanted to 'extend' the design. First thoughts were to provide the appearance of 'looking into' the first design. I added strips of pre-printed paper above & below, then hand-made slightly textured paper (with inked edges) to the sides.


Next, to continue the extended cell structure, I added other paper 'panels' above & below the existing one:
At the top edge (in pink), handmade paper on cotton scrim - the fabric edges created 'banding'.
At the lower edge(for more banding) another of my paper & scrim off-cuts (visible to the left) & one of the previously made 'nucleus' shapes (in waxed crayon on paper).

Although 'in the hand', the sample looks a little clumsy, on screen it has achieved exactly what I'm trying to do 'in my head'.


Monday, September 30, 2013

Cell structure design experiments ...

Here's some more mixed paper ideas I've completed in between the other ones!


Ink on card whilst on frozen block (close-up section to the right)


Handmade paper dried on nylon mesh 
(close-up section to the right)


Above sheet with waxed flourescent crayon & black ink applied after (close-up section to the right)


Handmade paper with black ink layer, wax crayon then reapplied ink.